前言
在网页应用中如何判别人机?常见的答案是验证码,但是本人其实烦验证码久矣。
虽然网页验证码已有许多变种,但是都难逃需要用户交互这一点,降低了用户体验。
故我把目光转向了 Cloudflare Turnstile,我在冲浪过程中时不时会碰到使用这类验证用户的网站,其无挑战验证的特性令我印象深刻,故我想将其嵌入到我的项目中试试。
开整
1. 原理&技术架构
原理
以下内容来自 gpt:
Cloudflare Turnstile 利用 Cloudflare 的机器学习模型来评估用户请求。通过分析用户设备和网络数据(例如鼠标移动、触摸屏交互、HTTP 请求头、IP 地址、浏览器信息等),它可以识别出异常的机器人活动和正常的用户行为。
Turnstile 会给用户交互生成一个隐式的风险评分。通过多个不同的信号,它会动态调整用户验证的难度。如果系统认为用户的行为模式可能属于机器人或不正常,则会进行更深入的评估甚至触发挑战机制,但通常用户体验依旧较为轻量化。
实现的总体流程:前端获取验证 token,后端验证 token,判断是否放行此次请求。
技术架构
接着介绍下我这次所使用的主要技术架构吧:
前端:React
后端:NestJS
2. 准备工作
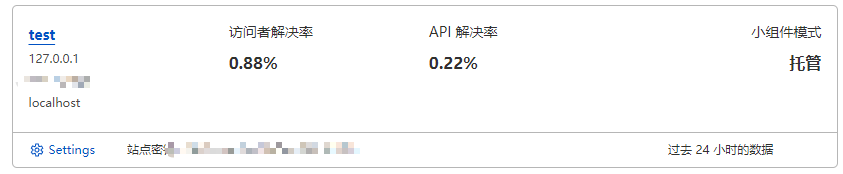
需要在 Cloudflare 中添加 Turnstile 组件,步骤较为简单。
注意配置好域(本地开发环境需要添加 localhost 和 127.0.0.1),以及记录下 Site Key 和 Secret Key
3. 前端实施
这里只放出核心代码吧,最终能获取到 token,能发送 token 到后端就行。
使用 Cloudflare 提供的 Turnstile widget 在 React 组件中进行集成。
1
npm install react-turnstile
添加到表单中:
1
2
3
4
5
6
7
8
9
10
11
12
import { Turnstile } from "react-turnstile"; // 引入react-turnstile组件
//...
const [captchaToken, setCaptchaToken] = useState(null); // 保存验证的token
//..
{
  /* Turnstile 人机验证组件 */
}
<Turnstile
  sitekey="你的CloudflareSiteKey" // 替换成你在Cloudflare获取的site key
  onVerify={(token) => setCaptchaToken(token)} // 验证成功后获取token
  className="mt-4"
/>;
这里就能获取到 token 了,后续具体处理就各异了。
4. 后端实施
这里使用axios来发送请求验证了,先安装npm install axios。
创建一个服务来验证 captchaToken:
1
nest g s cloudflare-verification
cloudflare-verification服务逻辑:
1
2
3
4
5
6
7
8
9
10
11
12
13
14
15
16
17
18
19
20
21
22
23
import { Injectable } from '@nestjs/common';
import axios from 'axios';

@Injectable()
export class CaptchaVerificationService {
  private readonly secretKey = '你的CloudflareSecretKey'; // 替换成你的Secret Key

  async verifyCaptcha(captchaToken: string): Promise<boolean> {
    const url = 'https://challenges.cloudflare.com/turnstile/v0/siteverify';
    const params = new URLSearchParams();
    params.append('secret', this.secretKey);
    params.append('response', captchaToken);

    try {
      const response = await axios.post(url, params);
      const data = response.data;
      return data.success;
    } catch (error) {
      console.error('Error verifying captcha:', error);
      return false;
    }
  }
}
使用cloudflare-verification服务(注意需要添加到Provider和依赖中)
1
2
3
4
5
6
7
8
9
10
11
12
async login(@Body() body: { email: string; password: string; captchaToken: string }) {
  const { email, password, captchaToken } = body;

  // 验证 captchaToken
  const isCaptchaValid = await this.captchaVerificationService.verifyCaptcha(captchaToken);
  if (!isCaptchaValid) {
    throw new BadRequestException('Invalid captcha');
  }

  // 继续处理登录逻辑
  return { message: 'Login successful' };
}
这样就可以了!
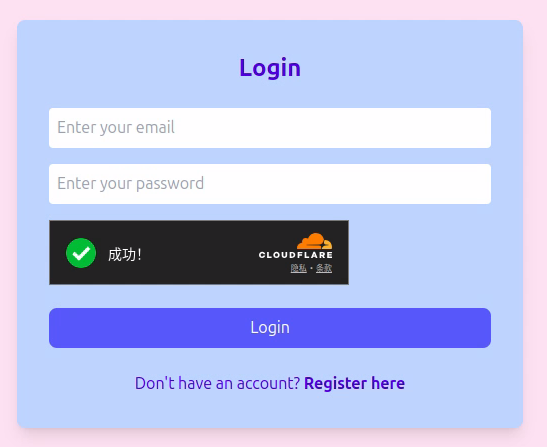
前端页面: